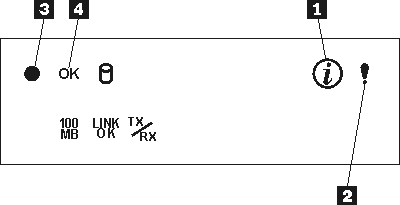
Complete the installation by switching on the appliance and running the power-on diagnostics. Each time the appliance is switched on, it runs a self-testing program to ensure that it is running correctly. If the power-on diagnostics complete successfully, the Information LED and the System Error LED are off; the POST Complete (OK) LED and Power-on LED are on. See Figure 12 for the locations of the Information LED, System Error LED, POST Complete (OK) LED, and Power-on LED.
|
If a problem is detected during the diagnostics, refer to the IBM TotalStorage IP Storage 200i Administrator's Guide.
After you plug the power cord of the appliance into the power supply and an electrical outlet, start the appliance by pressing the power button on the front of the appliance.
Attention: The operating system undergoes a series of initialization operations upon start up. The first time you start the appliance, a series of configuration and system preparation programs are run automatically. These programs must finish running before you use any included applications to connect to or configure your appliance. Wait at least 5 minutes to connect to or configure the appliance after the initial system start.