3 Steps During the Installation of FreeBSD
3.1 Reserving Space for Journaling
A typical desktop machine usually has one hard disk that stores both the OS and user data. Arguably, the default partitioning scheme selected by sysinstall is more or less suitable: A desktop machine does not need a large /var partition, while /usr is allocated the bulk of the disk space, since user data and a lot of packages are installed into its subdirectories.
The default partitioning (the one obtained by pressing A at the FreeBSD partition editor, called Disklabel) does not leave any unallocated space. Each partition that will be journaled, requires another partition for the journal. Since the /usr partition is the largest, it makes sense to shrink this partition slightly, to obtain the space required for journaling.
In our example, an 80 GB disk is used. The following screenshot shows the default partitions created by Disklabel during installation:
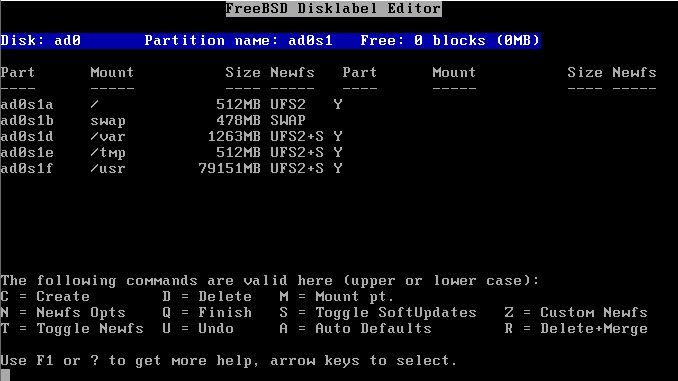
If this is more or less what you need, it is very easy to adjust for journaling. Simply use the arrow keys to move the highlight to the /usr partition and press D to delete it.
Now, move the highlight to the disk name at the top of the screen and press C to create a new partition for /usr. This new partition should be smaller by 1 GB (if you intend to journal /usr only), or 2 GB (if you intend to journal both /usr and /var). From the pop-up that appears, opt to create a file system, and type /usr as the mount point.
Note: Should you journal the /var partition? Normally, journaling makes sense on quite large partitions. You may decide not to journal /var, although doing so on a typical desktop will cause no harm. If the file system is lightly used (quite probable for a desktop) you may wish to allocate less disk space for its journal.
In our example, we journal both /usr and /var. You may of course adjust the procedure to your own needs.
To keep things as easy going as possible, we are going to use sysinstall to create the partitions required for journaling. However, during installation, sysinstall insists on asking a mount point for each partition you create. At this point, you do not have any mount points for the partitions that will hold the journals, and in reality you do not even need them. These are not partitions that we are ever going to mount somewhere.
To avoid these problems with sysinstall, we are going to create the journal partitions as swap space. Swap is never mounted, and sysinstall has no problem creating as many swap partitions as needed. After the first reboot, /etc/fstab will have to be edited, and the extra swap space entries removed.
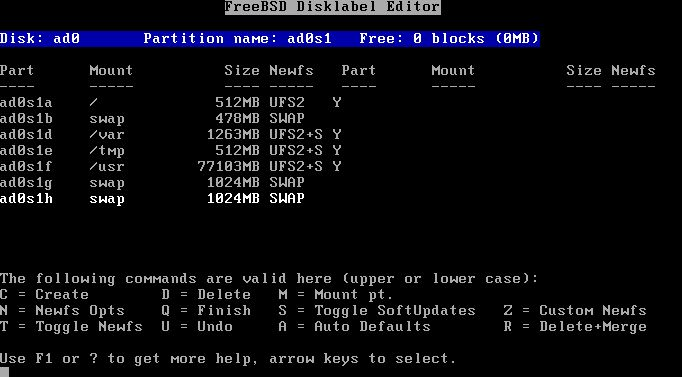
To create the swap, again use the arrow keys to move the highlight to the top of Disklabel screen, so that the disk name itself is highlighted. Then press N, enter the desired size (1024M), and select “swap space” from the pop-up menu that appears. Repeat for every journal you wish to create. In our example, we create two partitions to provide for the journals of /usr and /var. The final result is shown in the following screenshot:
When you have completed creating the partitions, we suggest you write down the partition names, and mount points, so you can easily refer to this information during the configuration phase. This will help alleviate mistakes that may damage your installation. The following table shows our notes for the sample configuration:
Table 1. Partitions and Journals
| Partition | Mount Point | Journal |
|---|---|---|
| ad0s1d | /var | ad0s1h |
| ad0s1f | /usr | ad0s1g |
Continue the installation as you would normally do. We would however suggest you postpone installation of third party software (packages) until you have completely setup journaling.
3.2 Booting for the first time
Your system will come up normally, but you will need to edit /etc/fstab and remove the extra swap partitions you created for the journals. Normally, the swap partition you will actually use is the one with the “b” suffix (i.e. ad0s1b in our example). Remove all other swap space entries and reboot so that FreeBSD will stop using them.
When the system comes up again, we will be ready to configure journaling.